Assembling the Box
Now that the access point is configured and all
of the hardware is available, it’s time to get everything
together, test it, place the access point into an enclosure, and
set it up on the roof.
Testing
When you have all the parts together, plug
everything in and make sure it all works and fits together.
Although you just tested the access point
settings, you
didn’t test the PoE adapter and the
actual cables
you’ll be using. This is a great time to find the bad connection
on that old Cat-5 cable you got from a friend’s garage. Use as
much of the final equipment as possible, including the high-gain
antenna and any pigtails. Figure 8-15 shows an example of this
test.
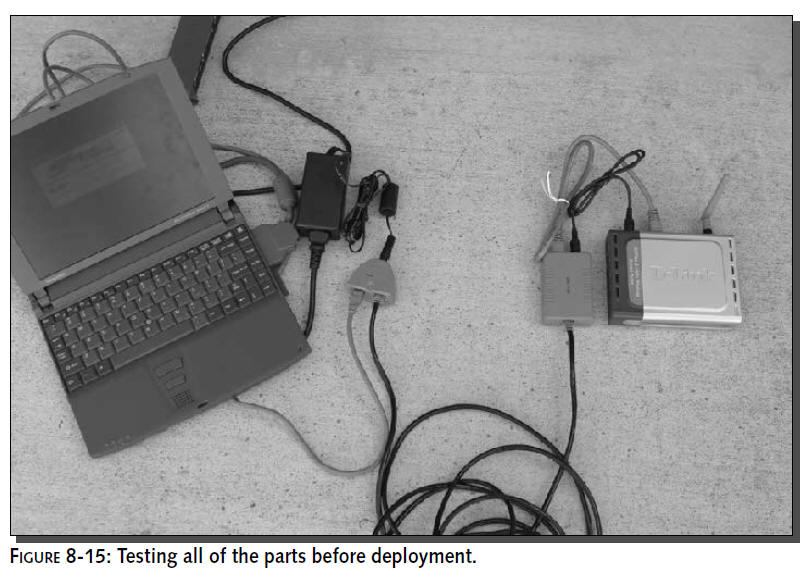
A laptop is connected to the access point via a
PoE adapter, while the long Ethernet cable connects much of the
equipment that will go inside the case. If it doesn’t work the
first time, start removing equipment to simplify things, or
start with what used to work and gradually change things. For
example, first use the original power supply and a standard
Ethernet cable, and add the external antenna.
If possible, connect the AP to the Internet in
its final software configuration. Then try to surf via a
wireless connection.When you’re done testing, you can be
confident that the hardware and software setup all work before
you start cutting metal and climbing on rooftops.
Measure Twice, Cut Once
Place the access point and PoE adapter into the
case and arrange them for best ventilation and fit. Then add the
internal cables and confirm that it still fits. It may be better
to replace a supplied cable with a shorter version, especially
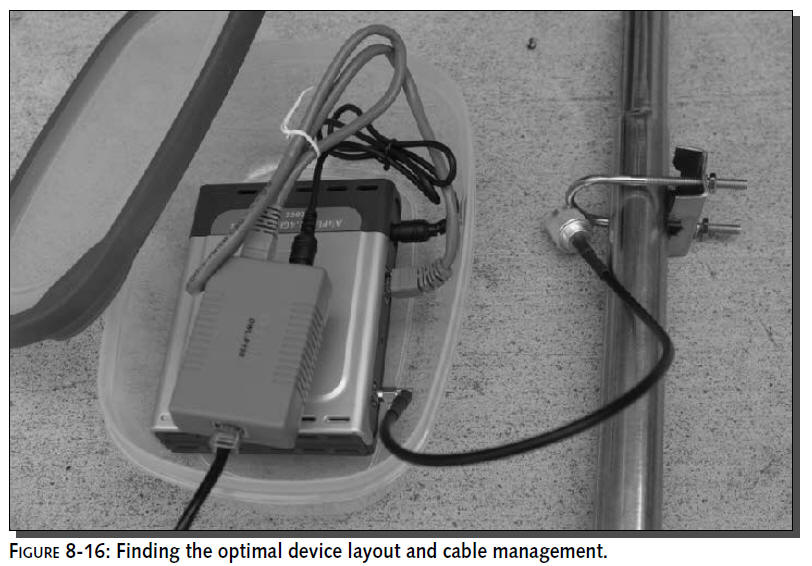
for stiff Ethernet cables. As shown in Figure 8-16, lay out all
the parts before modifying the case to ensure everything fits.
All cables should exit the case at the bottom to help stop water
from entering.
Next, add the pigtail and outside Ethernet
cable. The pigtail may be thick and stiff, so anticipate
carefully where it will run. It is important to have all cables
exit from the bottom of the case. This stops water from running
down the cable and into the case.
When everything is in place and connected, then
you can plan where the holes will go. If the fit is snug enough
for everything in the plastic food container, leave the access
point and PoE adapter loose in the enclosure. This will
eliminate the need for extra holes and mounting hardware.
You can remove the access point electronics from
its plastic case to reduce the space needed and enhance cooling.
However, this may void the warranty, and you have to be
extremely careful that no metal touches the electronics.
Be sure to plan for the case mounting to the
pole or wall as well. If bolts will protrude into the case, as
shown previously in Figure 8-9, make sure the equipment will
still fit. When everything is in place, mark the case carefully
to show where holes and mounting points are located. Then you’re
ready to start drilling and cutting.
Modifying the Case
The plastic case is easy to modify using simple
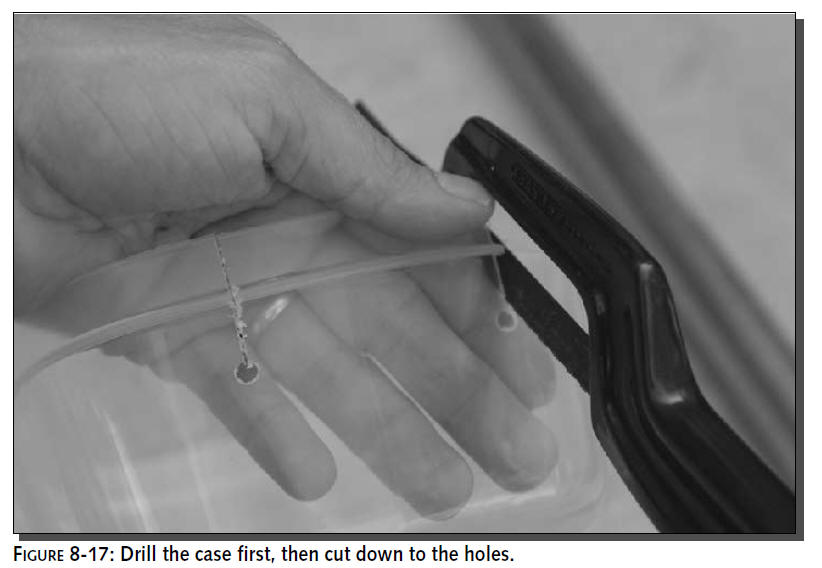
tools like a drill and small handsaw. First drill holes in the
case where the cables will pass through (see Figure 8-17). Make
sure your drill bit matches the cable thickness. The cable
should be snug, but not pinched. Any extra gap can be filled
with sealant.
.
With a plastic case, you can cheat a bit and cut
a line down to the holes. The plastic is flexible enough to bend
and allow the cables to pass down to the hole via the cut. If
you’re using a metal or thick molded plastic case, you have a
few options:
Make much larger holes to pass the connector through. You can
use sealant to fill in the gaps afterwards.
If
you have an Ethernet cable crimper and plugs you can thread the
bare cable through the hole and add
your own connector afterwards. This would be more difficult for
the pigtail, but fortunately,
pigtail connectors are usually smaller anyway.
Saw
a channel down to the hole using two cuts instead of the one
shown in Figure 8-17. You can put
the holes closer to the lid to minimize cutting and sealing.
A thin metal file like a rattail file is useful for
smoothing out holes or even cutting channels.
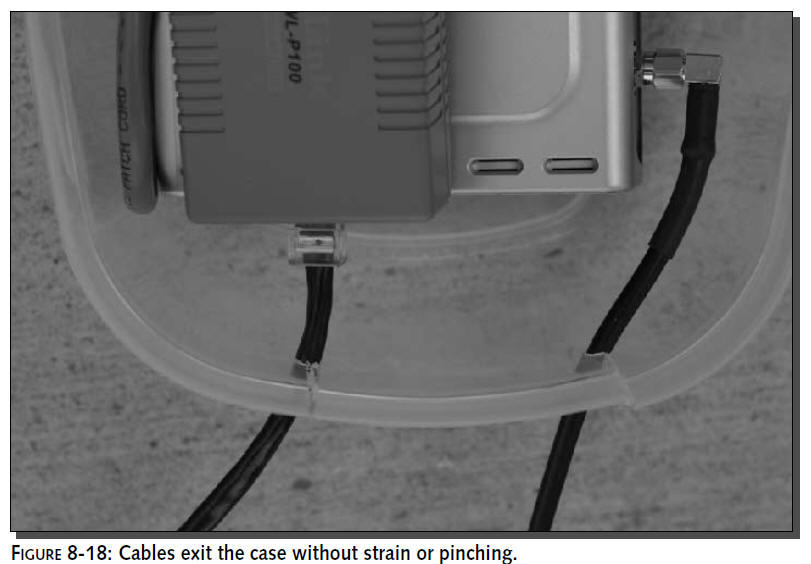
When using plastic, bend the plastic to thread the cables
through the cut. The cable should be
snugged but not pinched in the hole. (See Figure 8-18.)
If the enclosure is larger than the plastic box
shown here, you may need to mount the equipment directly inside
the box. The plastic box shown is already snug and there’s no
exposed electronics, so no mounting is needed. Condensation can
form on the inside of a metal case during changing temperatures,
so mount equipment away from the walls to avoid water running
onto the electronics. Another reason to
mount equipment inside the box is to avoid
movement and damage in high winds or even during
installation. Also, connectors may develop poor
connections over time if they’re continually
moved or strained.
Make a final check to ensure that everything
fits as you expect and that nothing is touching or
rubbing where it shouldn’t be.
Mounting the Case and Antenna
The case is now ready to be mounted on a pole or
wall. The steps are:
1.
Mount the case on the pole
2.
Mount the antenna on the
pole
3.
Connect the lightning
arrestor, antenna, and pigtail
4.
Make the connectors
watertight
5.
Zip tie the cables,
leaving drip loops (drip loops give water a place from which to
fall)
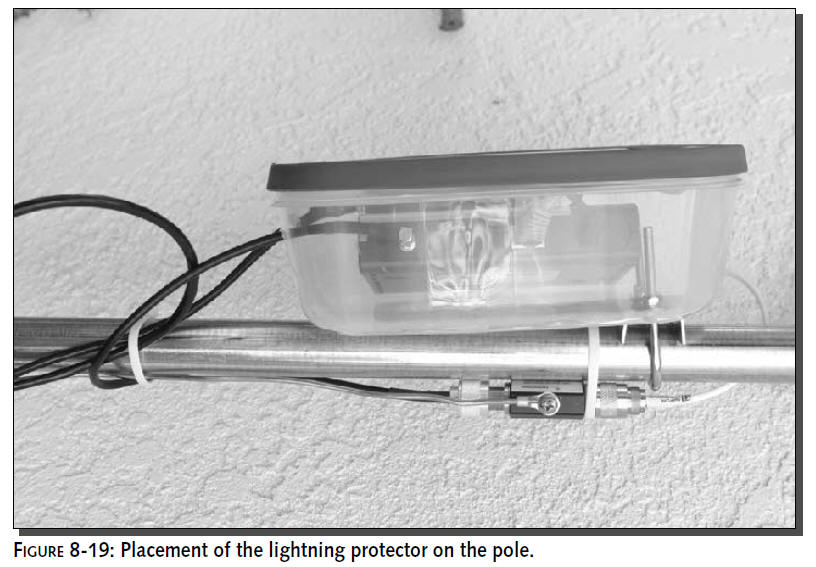
Mount the case on the pole and then mount the
antenna using the instructions that came with your antenna and
its mounting hardware. Add the lightning protector between the
antenna and pigtail and attach the bare copper grounding wire.
(See Figure 8-19.)
Screw the lightning protector into your antenna
connector and then attach the pigtail to the other side of the
lightning protector. Add the 8 gauge grounding wire to the
lightning protector and run it down the pole with your other
cables. As you work with the cables, be sure to add so-called
“drip loops.” These are loops in the cable where rain will
naturally drip off instead of running down the cable and inside
connectors or cases. See Figure 8-20 for an example of a drip
loop. This simple cabling trick keeps water from pouring down
onto the connectors.
Anatomy of a drip loop:
Leave a curve in the pigtail as it exits the bottom of your case
before it goes back up to the
antenna. Rain will run off the case and down your cable until it
gets to the curve and drips off. If
you have the cable so tight that it doesn’t have a curve, then
water may run down the cable from
the antenna and into your case.
If
your antenna has a short length of cable on it before the
connector (rather than a fitting
right on the antenna), you may have enough room to put a loop in
the antenna cable before it goes
into the lightning protector. Again, this will allow rain to run
down the antenna, down the antenna
cable, and then drip from the bottom of the loop—instead of
running down the antenna cable and right into the
lightning protector.

Put
a complete loop in the Ethernet cable where it exits at the
bottom of the box and fasten it to
the pole. This is the least critical cable as it has no outside
fittings, but it’s still good to
get water off the cable Use plastic
fasteners, such as plastic zip ties, to hold things in place.
However, don’t tighten them too
much on the antenna or Ethernet cables. This dents the cable,
which reduces its effectiveness and
decreases your signal.
If you have a choice, buy plastic fasteners
labeled “UV resistant.” Otherwise, they may become brittle and
break due to sun exposure.
When all the cables are in the correct places, it is time
to waterproof the connectors and install
the final cable ties.
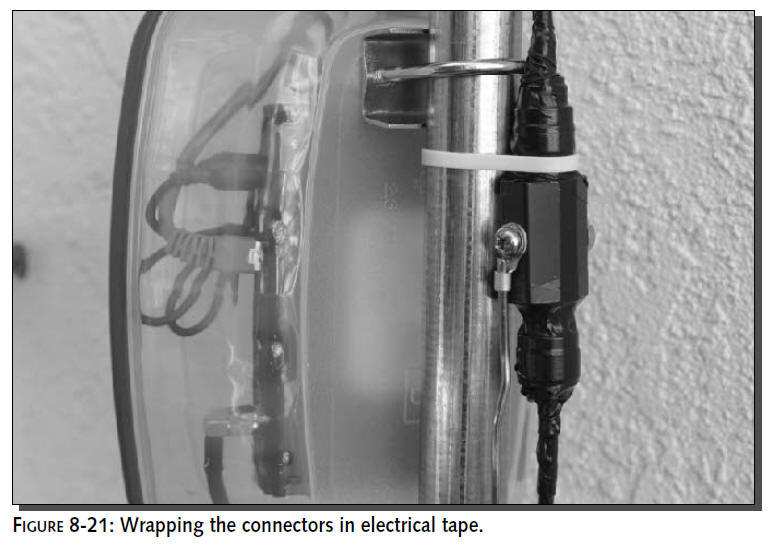
For most installations, standard electrical tape
will work great for waterproofing (see Figure 8-21). Apply the
tape liberally by wrapping from the bottom to the top with lots
of overlap. You may need to remove and reinstall some of your
cable ties to do this properly.
Applying the electrical tape from bottom to top helps stop rain
from creeping under the edges and loosening the tape over time.
For extreme weather conditions, there are lots
of exotic waterproof solutions, including waxes, glue-like
materials, and layers of different types of tape. Search online
for waterproof connector tape to find a solution that meets your
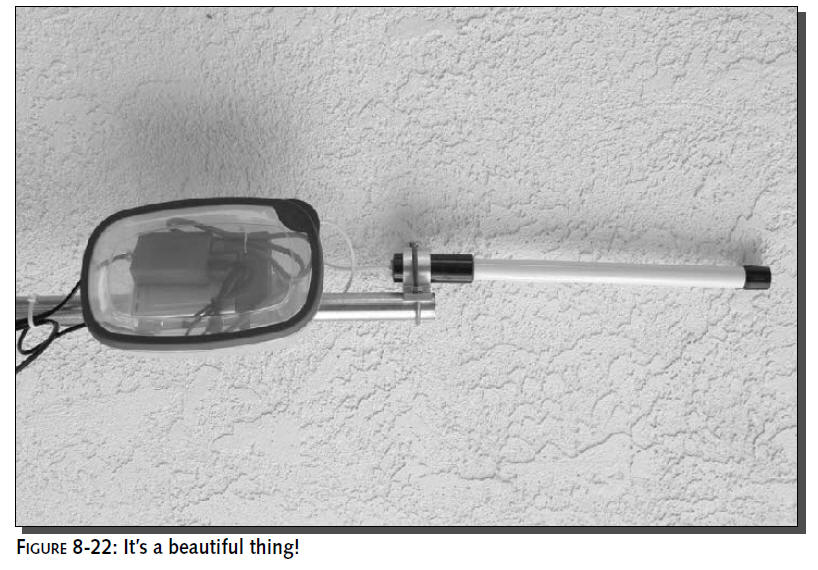
needs and budget. When you’re all done, stand back and admire
the beauty of your creation. (See Figure 8-22.)
Temperature and Water Testing
There are just two steps left before climbing on
the roof.Temperature testing ensures that the access point
electronics stay within tolerable limits. If things run too hot,
frequent errors and lockups can occur, and the lifespan of your
equipment will be diminished.
Test for water tightness in the optimal working
conditions: while it’s dry and sunny. Your nerves will be
rattled enough worrying about the equipment in a rain storm,
even if you know it passed water tests on the ground.
Temperature Testing
Look carefully at your access point. Chances
are, there are ventilation slots in its case. These are designed
to encourage a convection flow of air to cool the electronics.
Now that it is enclosed in your outdoor case, it won’t be cooled
as originally intended, so you need to see if the box needs
ventilation holes.
Plastic cases tend to get hotter inside than
metal cases. The metal walls drain heat from air inside the
case, which keeps it closer to the outside air temperature. For
the same reason, it’s important for the metal case to be a light
color. A black case can get very hot and makes it hot inside.
For a great demonstration of this, touch a black car and a white
car that have both been in the sun for a while.
Here’s how to temperature-test your case:
1.
Find a suitable
thermometer and put it in your case. Use the manufacturer’s
stated operating temperature as a
guide for selection. For example, the pictured D-Link has a
range of 32 to 131
�F
(0–55 �C),
so you can use an oven or BBQ thermometer if it starts around
100 �F
(37 �C).
2.
Find a convenient shaded
location, plug the Ethernet cable into the PoE adapter and
your home network, and test that everything is working
okay.
3.
Close the case up as it
will be when finally mounted.
4.
Stress the access point by
copying a large file via wireless from another computer on your
network. This will ensure a high-speed transfer that will heat
everything up more than running at
idle.
5.
Check the temperature
frequently at first, to be sure you don’t fry anything.
If you can read the temperature without removing
the thermometer, you’ll see when it reaches a steady state and
you can stop. Otherwise, a few hours should be enough.
If the box gets too hot, then add cooling holes
in a way that keeps the box dry inside. You could start by
adding an open hole at the bottom. Then if water does find its
way in, it will eventually drain out.
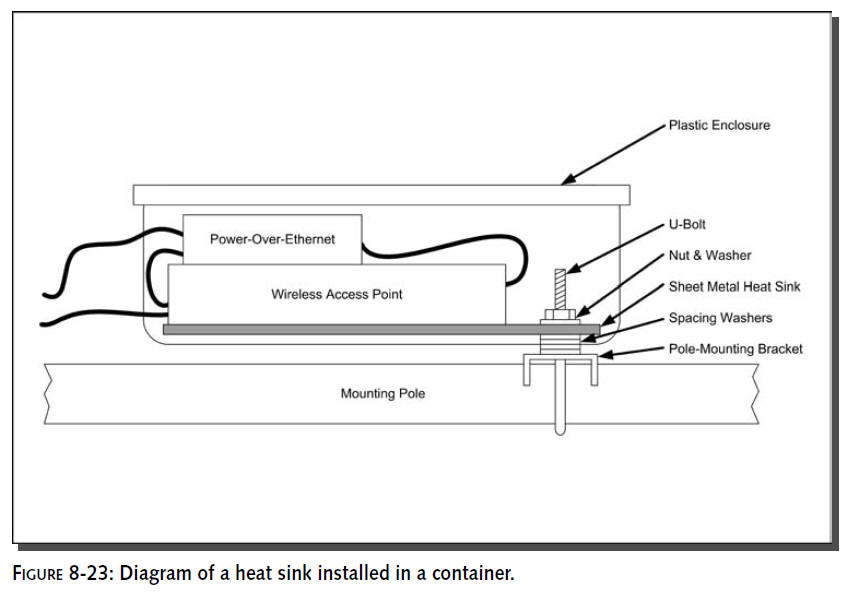
Another way to cool a plastic box is via the
mounting bolts that go through to the mast. Screw a heat sink to
those bolts on the inside of the case. This will transfer heat
from inside air to the outside mast via the metal fittings. The
heat sink can be as simple as a piece of scrap metal that fills
the entire bottom of your case. See Figure 8-23 for an example.
When it’s running at a good temperature in the
shade, move it to an environment that matches your final
location, such as in the sun. Then repeat the test steps and
confirm that it’s still okay.
If the box won’t stay cool enough, some
possibilities are:
Add
a matching hole near the top, on a side, and at the bottom to
encourage convection cooling.
Keeping water out might be hard though.
Find a different mounting case (for example, switch from plastic
to metal).
Add
a case fan (a simple solar powered fan would be easiest).
Find a cooler location to install the box (such as under an
overhang in perpetual shade).
If
the case is close to the maximum temperature, install it anyway
and plan on replacing the access point after its run hot for a
few days, weeks or months (this might be cheaper
to try than messing around a lot with the case).
Water Testing
Now the final step, will the box stay dry
inside? Grab a bucket of water, dunk it, and find out—no wait,
just kidding!
Seriously, it is useful to see how watertight
your box is, but you need to do it the right way. A garden hose
on a gentle spray setting is a good way to start, or under a
shower nozzle. Be sure to simulate rain by holding it above your
case and then leave it there for several minutes before
checking. Place toilet paper in your case before testing to
provide a fast visual indication that all is still dry. Leave
everything powered off while you’re doing these tests.
Gradually increase the test length until you get
to 20 or 30 minutes of gentle spray. Pat yourself on the back
for a job well done when you retrieve your nice dry toilet paper
afterwards. Congratulations!
If the case leaks, find a tube of outdoor
sealant at your local hardware store and apply appropriately.
Realize that when you seal, it blocks cooling, so it’s prudent
to retest your operating temperature if you need to add a lot of
sealant. Repeat until dry.
Make sure that all electrical equipment is
completely dry before you apply power. Expect 30 minutes or more
(depending on the weather) for the slow effects of evaporation
to dry out electrical equipment.
Put it On the Roof Already!
After all the assembly and testing, everything
is ready to go. Find a nice safe ladder and mount your new
outdoor access point. Run the Ethernet cable back inside the
house, plug it into the PoE adapter and confirm that everything
is working.
Some areas receive frequent lightning strikes.
Before mounting your access point outside in such an area, find
some local person who understands grounding and follow his or
her advice. Local amateur radio operators are a great source of
information, as are TV or cable installers. Your local fire
department can also provide information and resources.
Last, but not least, find a good ground for the
lightning protector grounding cable. The 8 gauge copper wire
should be run via the most direct route possible to a ground
rod. Ground rods should be either solid copper, copper-clad
steel, hot-dipped galvanized steel or stainless steel. They
shouldn’t be smaller than 8 feet in length and 1/2 inch in
diameter.
You’ll need fittings designed for grounding to
connect everything together. Ground your case (using the same
wire) if it is metal. You may be able to use a metal water pipe
in place of a ground rod. Clean the pipe with a wire brush to
expose bare metal and use a fitting designed for grounding to
attach the ground wire to the pipe.
Complete grounding protection advice is beyond
the scope of this book. Search online for “antenna grounding
lightning guide” for more information. Some useful starting
places are:
www.qsl.net/ccarc/light.html
www.polyphaser.com/ppc_pen_home.asp
With grounding completed and unit powered on,
you’re ready to e-mail the neighbors to start a nightly WLAN
party gamefest.