We will be using a copper wedge as the driven
element or radiator. The location and length of this element is
extremely important. Although we will not be going too deep into
the math here, it’s important to understand where this driven
element is to be installed. The rule of thumb is that the driven
element should be at one quarter of the “closed-space
wavelength” from the inside edge of the can when the connector
is installed. The difficulty here is that the closed-space
wavelength will vary based on can and radiator dimensions.
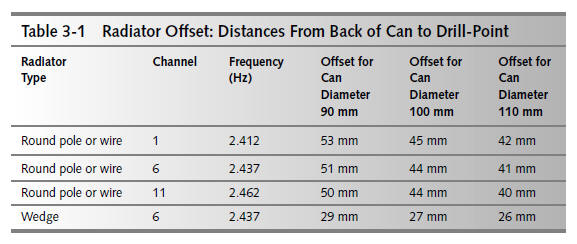
Table 3-1 shows some of these dimensions for
channels 1, 6, and 11 using two different types of radiators. A
narrow-band pole, and wideband wedge. The wideband wedge needs
to be built only for channel 6 because it operates well across
the entire Wi-Fi range of frequencies.
On our can, with an inner diameter of 100 mm,
this offset was slightly more than 1 inch or 27 mm. Once you
have this measurement, it is time to prepare the hole in the can
where the N-Connector is to be installed.
Remember to measure this carefully, because a
mistake means you need to buy and use more coffee.
Step 1: Measuring the Distance to the Opening
As mentioned earlier, measuring the distance to
the opening is critical to the operation and efficiency of the
antenna. The old saying “measure twice and cut once” is also
true here. But instead, remember to “measure twice and drill
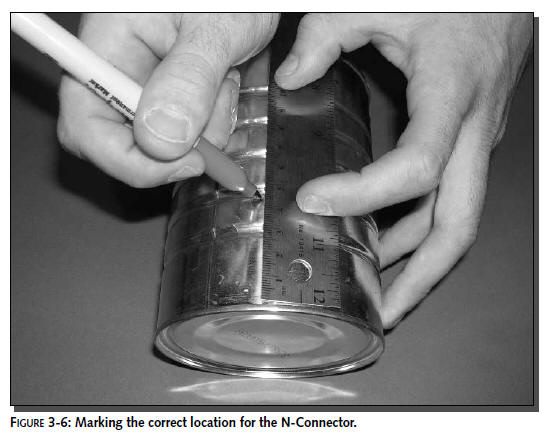
once.” Measure the correct distance from the top of the ridge at
the bottom of the can, as shown in Figure 3-6.
When you measure this distance, disregard the
bottom lip of the can. This crimped edge of the can has no
influence on the interior workings of the waveguide. You are
only interested in the bottom material of the can, which becomes
the back of your can antenna.
Step 2: Starting Small
There are several ways to get the hole for the
N-Connector the right size. The method you use is up to you. The
final hole should be the diameter of the N-Connector stem. In
one method you can drill a small hole and work your way up to
the desired hole size. Another method, which is more
time-consuming, is to use a nail to make the initial hole and
use a file or cutter to enlarge the hole. If you
use this method, make sure you don’t dent the side of the can.
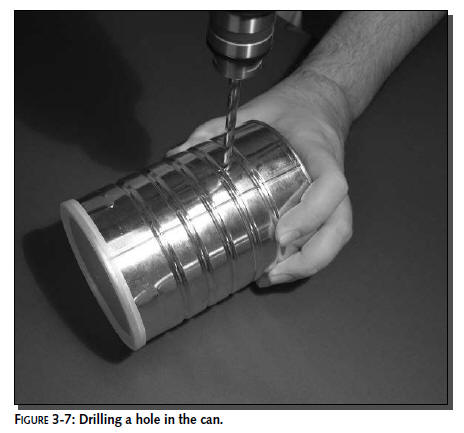
The can should stay completely round. We drilled the hole using
a 3/4 inch drill bit, as shown in Figure 3-7.
Step 3: Preparing for the Connector
There are different types of N-Connectors that
you can use for this project. The type does not really matter.
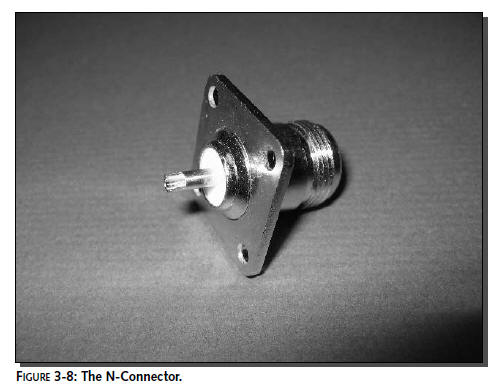
As you can see from Figure 3-8, our connector had four screw
holes (one at each corner). The best way to ensure that the
connector is installed properly is to insert it into the opening
you created in Step 2, line it up, and mark out the holes for
the four mounting screws. Once this is done, you can drill them
with a drill of the same diameter as the mounting screws.
Step 4: Finishing the Hole
The final step in preparing the N-Connector hole
is cleaning it. Using a small file, make sure that there are no
edges or burrs around the openings. This will ensure a tight fit
when the connector is inserted and connected to the coffee can.