Time to Go Outside
Before you head up to the installation site, one
last item needs to be created, purchased, or built: the solar
panel mounting system. A solar panel mount can vary greatly in
price depending on options. A high-end mount costing hundreds of
dollars can be automatically or manually tilted during different
seasons to account for the angle the Sun’s rays strike the
panel. If you are in low sunlight areas, an adjustable mount
like this may be the best option to maximize exposure. If you
want to go crazy, robotic mounting systems can be found that
track the sun as it moves across the sky during the day. If you
happen to be in an area where sunlight is plentiful, a fixed
mount is less costly and easy to build.
Building a Mounting Bracket
You need to determine the installation angle
before building a fixed-angle mount. For most installations a
tilt angle of 45 degrees is sufficient. For systems at latitudes
higher than 45 degrees from the Earth’s equator, a panel tilt of
60 degrees or more is necessary.
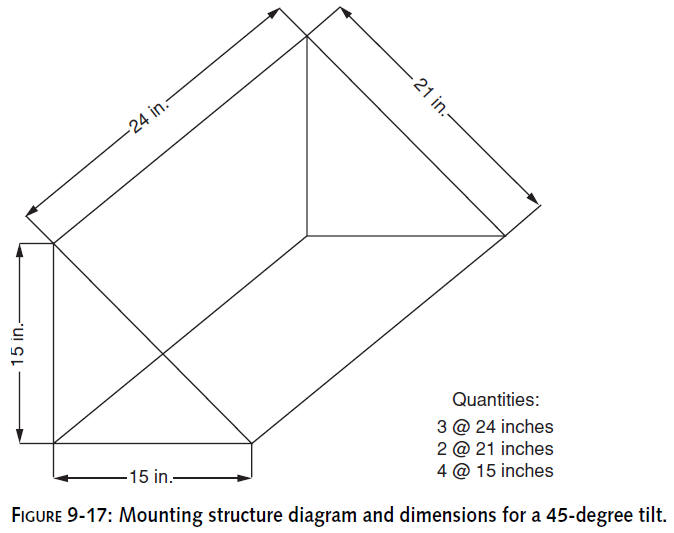
Building a mounting system out of angle iron is
cheap and easy. The structure dimensions are shown in Figure
9-17.To accommodate the SP75 solar panel, the mount was cut into
21-inch long angles, with 15-inch horizontal and vertical
braces. The side connectors were cut in two feet lengths.
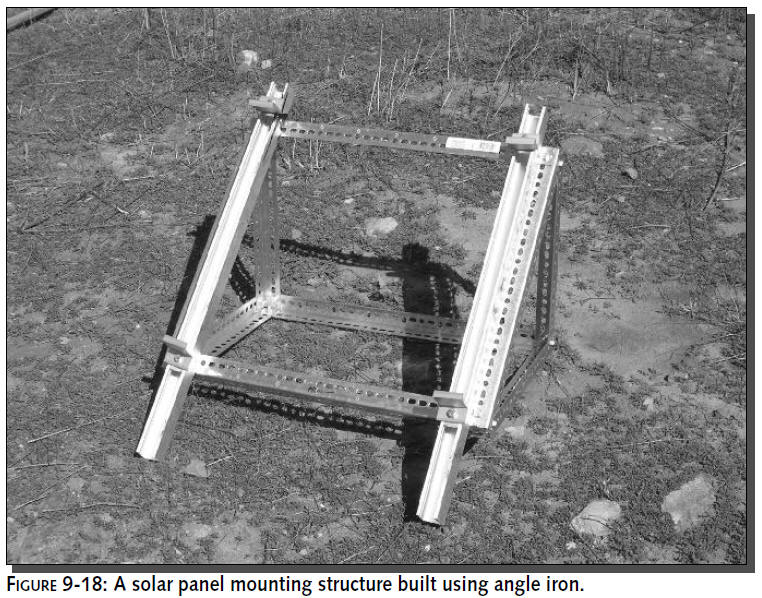
Fortunately, the SP75 panel came with custom
mounting rails designed to hold the panel down by pressure,
without the use of drilling or bolts. The entire structure was
bolted together and stands ready to accept the SP75, as shown in
Figure 9-18.
Sinking the Pole
A pole mount was chosen for this project because
of high availability and low cost. Other in-the-field mounts
include guyed tower and cinder-block secured frames. These
alternatives are available from most wireless equipment
distributors.
When using a basic 2-inch diameter pole, you
should dig at least a 36-inch deep hole to securely mount the
pole. It will be supporting upwards of 100 pounds and in order
to ensure that it tolerates mid-range wind conditions, we
strongly recommend that you cement this pole into the ground.
This will make for a sturdy and professional installation.
Select a location on the site that will offer
the widest coverage area in the spots you will most need it. For
instance, you may be able to install this gear in the center of
your coverage radius, but due to terrain features or landscaping
that could reduce sun hours, other spots may be more suitable.
Ensure that shade or shadows will not fall across the solar
panel. Anticipate the Sun’s angle during winter and summer
months.
Once you have settled on the perfect spot, you
will need to dig a hole at least 3 feet deep and 3 feet in
diameter. Mix adequate amount of concrete as specified by your
local hardware store specialist and fill the hole completely.
Slip the pole into the hole filled with concrete and use a level
or plumb bob to make sure that the pole is truly vertical.Wait
overnight for concrete to set before proceeding to the next
step.
After sufficient time has elapsed and you are
comfortable with the hardness of the concrete, go ahead and
cover up the concrete with dirt to hide the base and help
restore the natural surroundings.
Mounting the Equipment
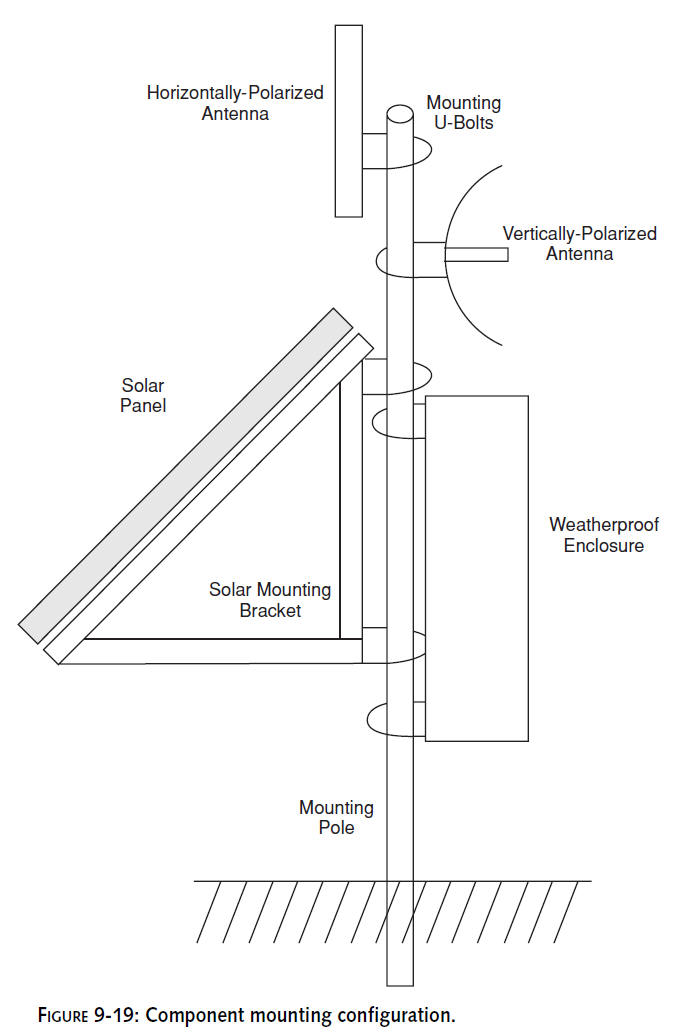
The placement of all of the components on the
pole is not critical, but needs to be planned for space. The
diagram in Figure 9-19 shows the components of this system and
how they are located on the pole. Place the solar panel at a
height that makes it inconvenient for critters to climb on and
low enough that birds will not feel comfortable roosting for an
extended time.
The goal is to minimize scratches and keep the
panel as clean as possible.
At least two people should work together to mount this
equipment to the pole. Safety is
paramount when working on heavy equipment. One or two people
should hold the equipment in place while another tightens down
the hardware.
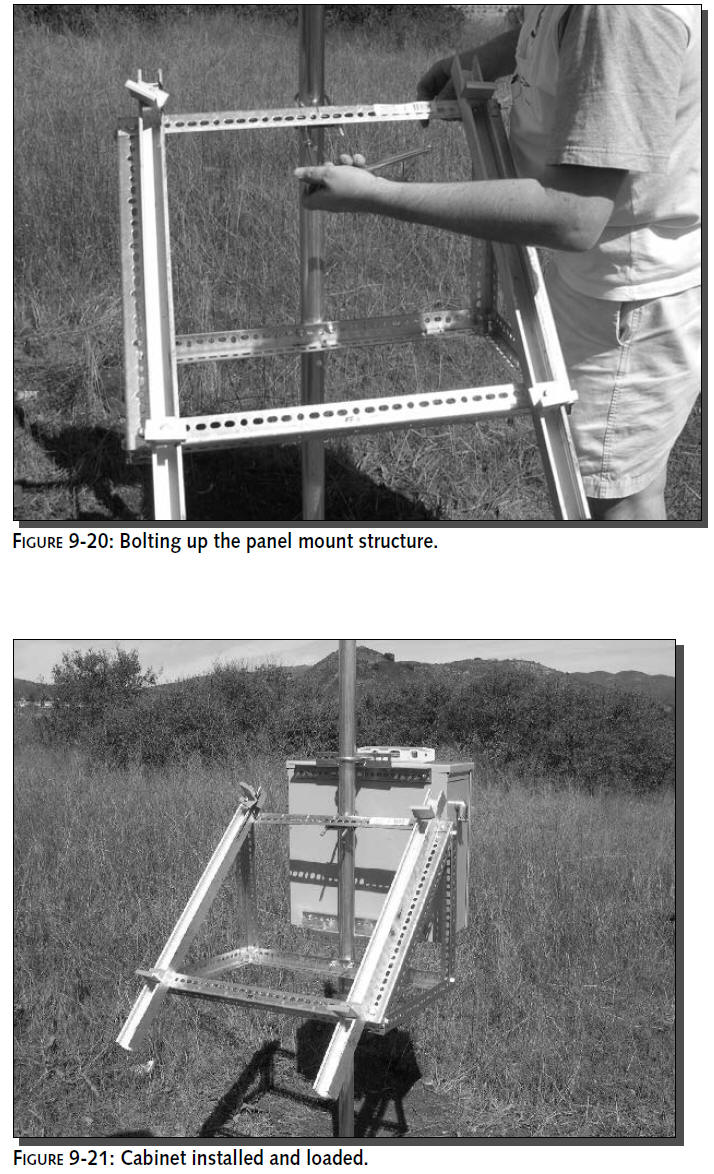
The equipment will be attached to the pole using
U-bolts. Mount the mounting system to the pole, leaving the
solar panel to the side for the time being. You will connect the
solar panel last. When attaching the panel mount structure,
ensure the panel will point due South once attached. Use
heavy-duty U-bolts to bolt the structure to the pole (see Figure
9-20).
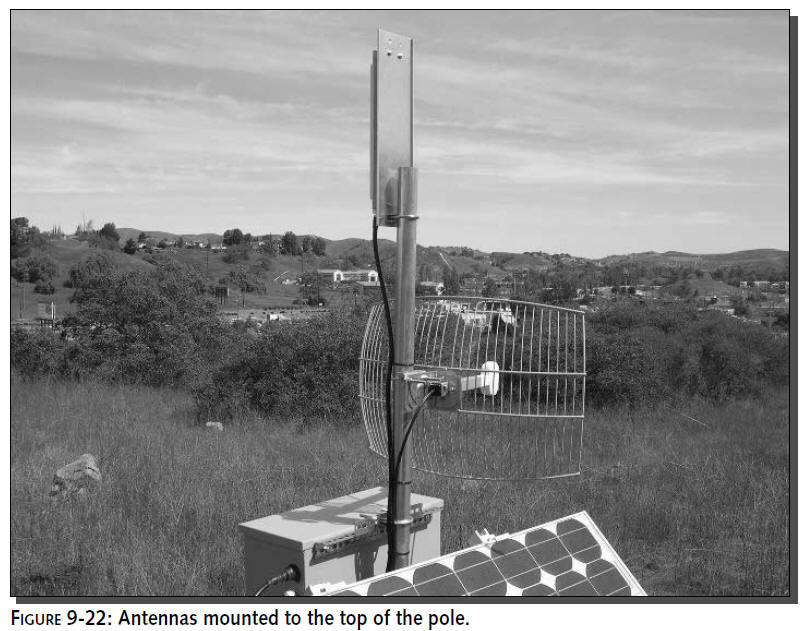
The control cabinet is next. Remove extra
components if necessary to reduce weight while mounting. Keeping
the batteries aside is a good idea. Removing the other
components is optional. Once again, use heavy-duty U-bolts or
other appropriate fasteners to secure the cabinet in place.
Figure 9-21 shows the cabinet in place behind the panel mount
structure.
Once you have completed the mounting of the
Cabinet, open the door and slightly rock the Cabinet
side-to-side to verify its sturdiness.
With the cabinet
installed and secured, install the batteries and attach any
wiring that was disconnected before the move.
Mounting the Antennas
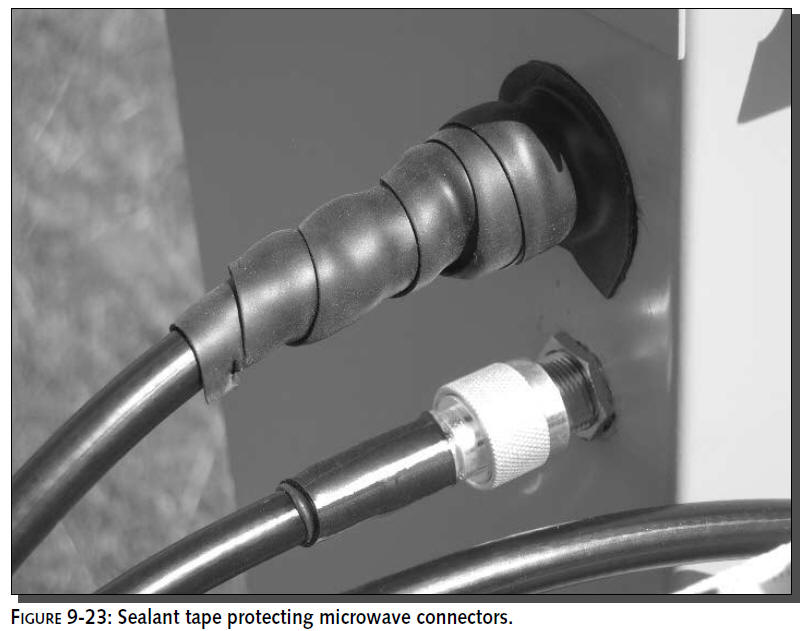
The antennas should be mounted as high as
possible on the pole. Direction will be determined by the
coverage area and uplink source. If possible, try to keep the
antenna from casting shadows over the panel. This cannot always
be avoided. Select low-profile or “shadow-friendly”
antennas if possible. For example, a parabolic
grid antenna or Yagi will cast less of a shadow as compared to a
panel antenna. U-bolts will be used to fasten the antennas to
the pole. Some antennas use articulating mounts for angle
adjustment. Other antennas may have built-in electrical
down-tilt. Check the specifications for your antennas and mount
them as needed.
When mounting antennas for different radios as
you are doing here, interference becomes a major factor. One
method of reducing radio interference is by adjusting the
polarity of the signals to be 90 degrees apart. That is, set up
one antenna in a vertical polarization, with the other using a
horizontal polarization. The antenna documentation will denote
polarization.
In Figure 9-22, the parabolic grid antenna is
vertically polarized, while this particular sector antenna from
SuperPass.com is electrically designed for horizontal
polarization (even though it’s vertically mounted).
To further reduce interference, you can use
signal filters on the antenna lines. Filters made for specific
channels of the 802.11b spectrum are available at a cost of a
few hundred dollars each.
Remember to make the antenna connections water-tight.
Electrical tape is a fair alternative,
but since this is a remote site, and support calls would
require a special trip, the best solution is
sealant tape. At ten dollars a roll, it’s not
cheap, but it is the best product out there for this task. For
comparison, Figure 9-23 shows the tape in place on the top
antenna connector.
Mounting the Solar Panel
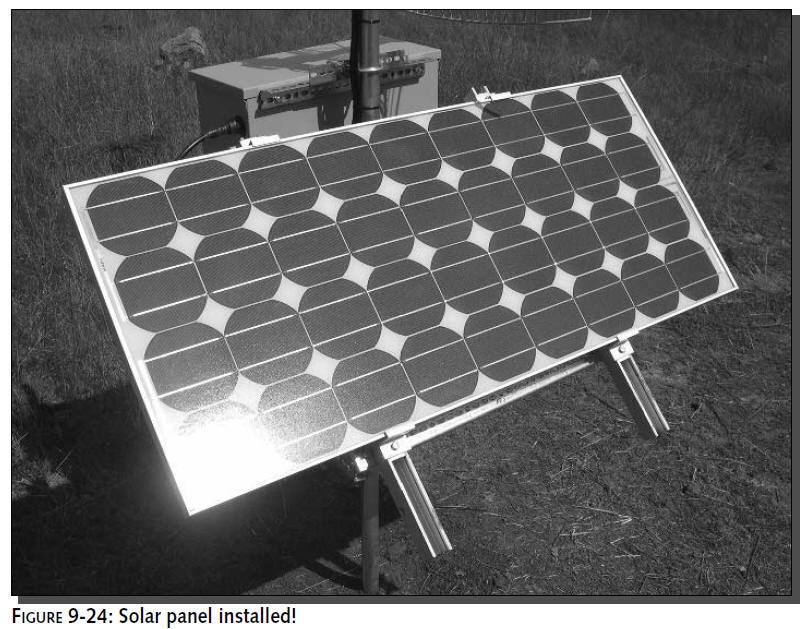
The final step is to place the solar panel
reverently onto the mounting structure and bolt it down (see
Figure 9-24). Keep the panel covered with an opaque material
when you’re attaching the electrical wiring. Use a large piece
of cardboard, a beach towel, or anything that covers the surface
entirely.
After the panel is securely in place, attach the
conduit to the junction box on the underside of the solar panel.
And connect the black wire to the negative (
�)
terminal and the red wire to the
positive () terminal. Do the same on the charge controller
attachment points. Follow the
precautions and directions included with the solar panel you are
using. The electrical attachment
points in the junction box may vary widely with each
manufacturer and product.
Remember that the panel creates electricity when
illuminated by sunlight. The voltage from a single 12-volt panel
is not considered a shock hazard, but to avoid sparks and
possible damage, do not short the leads while attaching the
panel connections to the charge controller.