Putting it all together
Now it’s time to assemble your radio and see
whether you can pick up a signal. Follow these steps to complete
the project:
1. Attach Velcro to the breadboard and the box
and then secure the breadboard in the box.
2. Attach Velcro to the battery packs and the
box and then secure the battery packs in the box.
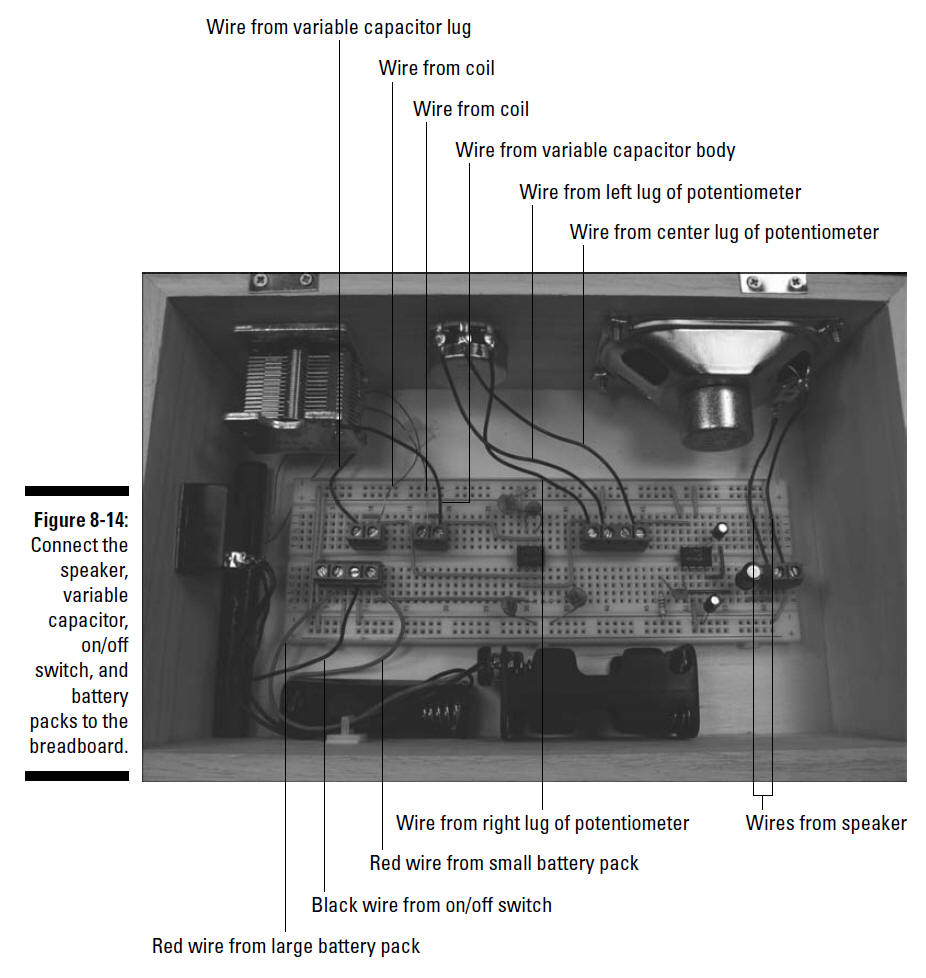
3. Insert the wires from the speaker,
potentiometer, variable capacitor, coil, battery packs, and the
on/off switch to the terminal blocks on the breadboard, as shown
in Figure 8-14.
4. As you insert the wires, cut each of them to
the length needed to reach the assigned terminal block and strip
the insulation from the end of the wire.
Keep the wires from the potentiometer as far away as
possible from the wires from the
speaker or the wires from the variable capacitor/coil.
You’ve no doubt experienced how having a microphone too
close to a speaker can produce an
awful screech; the same screech can occur if
these wires get too close together.
5. Secure the wires with wire clips where
needed.
The way parts are laid out in this box and the distance
between some of the components
(such as the speaker, potentiometer, and variable
capacitor to the terminal blocks) is short enough that
you won’t need wire clips.
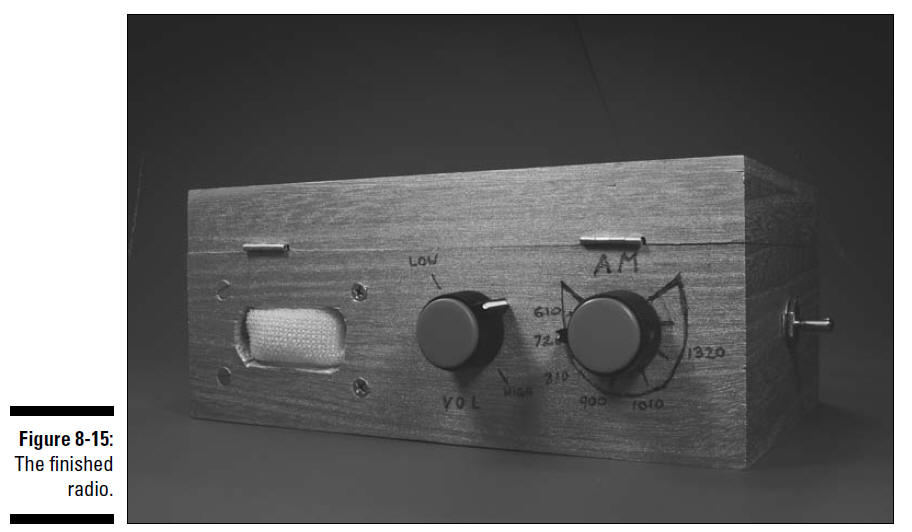
6. Close the lid on the box and admire your
finished radio, as shown in Figure 8-15.