
Focusing Sound With a Parabolic Microphone
Mounting everything on the dish
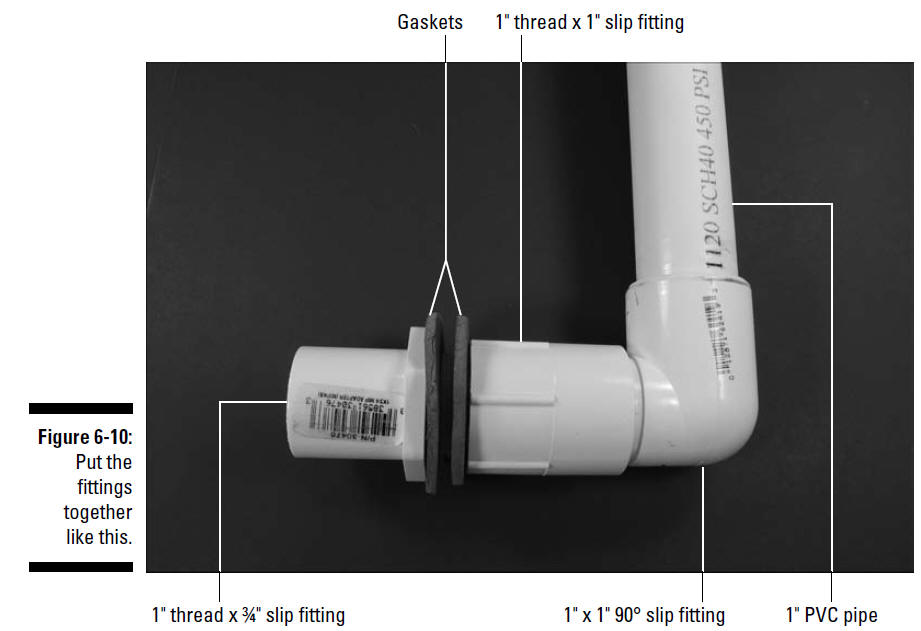
Time to assemble the handle that allows you to hold the parabolic microphone. Figure 6-10 shows how the pieces (minus the parabolic dish itself) go together. When these fittings are assembled on the parabolic dish, the threads go through the hole in the center of the dish with one gasket inside the dish and one gasket outside the dish.
1. In the sheet of gasket material, cut a hole (using your utility knife or X-ACTO knife) large enough to slip over the 1" threads.
Use one of the PVC fittings as a template.2. Use scissors to cut the outer diameter of the gasket about 3⁄8
" larger than the inner diameter.3. Repeat Steps 1 and 2 to create a second gasket.
Whenever you cut with a utility knife or an X-ACTO knife, wear leather work gloves to reduce the chance of cutting yourself if the knife slips.
4. Glue a 16", 1"-diameter PVC pipe into the female end of the 90° fitting.
5. Glue the male end of the 90° fitting into the slip fit end of the 1" x 1" fitting.
Gaskets 1" thread x 1" slip fitting 1" thread x ¾" slip fitting 1" x 1" 90° slip fitting 1" PVC pipe6. Drill a 3⁄8" hole about eight inches from the end in the side of the PVC pipe that will be to your left when you’re holding the parabolic microphone.
You use this hole to feed the wires from the microphone cartridge to the box containing your circuit.
7. Slip one of the gaskets over the threads on the 1" x 3⁄4
" fitting. Then slip the threads from the inside through the hole in the dish.8. Slip the other gasket over the threads and then screw the 1" x 1" fitting onto the threads.
9. Tighten the fitting by hand so that the gaskets are compressed a little and the dish is held securely between the gaskets.
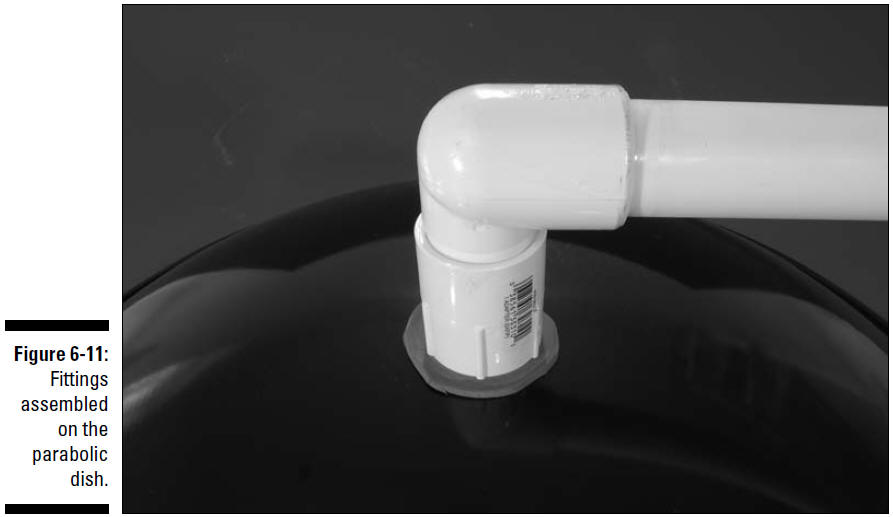
Figure 6-11 shows the handle assembled on the dish.