Putting everything together
After you have a completed breadboard, all the
switches in the box, and the microphone and dish assembled, it’s time to
put all those elements together. Follow these steps to finish building
your parabolic microphone:
1. Attach Velcro to the breadboard and the box and
secure the breadboard in the box.
2. Attach Velcro to the battery pack and the box and
secure the battery pack in the box.
3. Insert the wires from the headphone jack,
potentiometer, phono jacks, battery pack, and the on/off switch to the
terminal blocks on the breadboard, as shown in Figure 6-18.
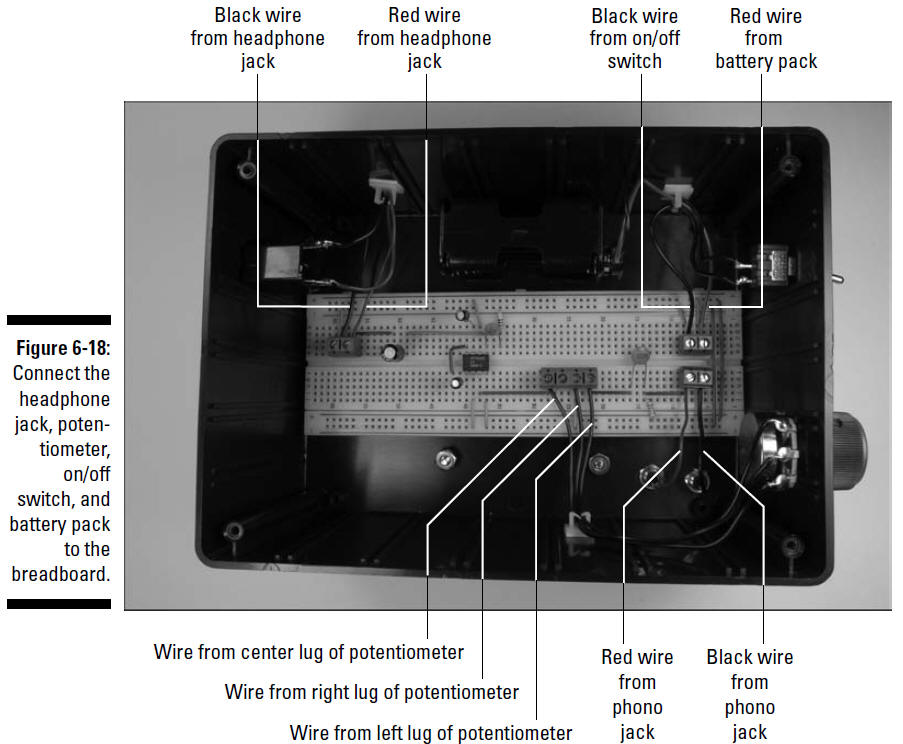
4. As you insert the wires, cut
each of them to the length you need to reach the assigned terminal block
and strip the insulation from the end of each wire.
Keep the wires from the headphone jack as far as possible away from the
wires from the potentiometer and the wires from the microphone
cartridge. Remember how a microphone put too close to a speaker can
produce an awful screech? The same screech can assault your ears if
these wires get too close together.
5. Secure the wires with wire
clips where needed.
The way that parts are laid out in this box as well as the distance
between some of the components — such as from the phono jacks to the
terminal blocks — are both short enough that you won’t need wire clips.
6. Slip the box onto the PVC
pipe and tighten the clamp screws.
Don’t tighten them too much; you still need to slide the box into its
final position.
7. Put batteries in the battery pack and put the lid
on the box, securing it with the screws provided with the box.
8. Slide the box into its final position just below
the hole where the phono jacks come out of the PVC pipe. Then insert the
phono plugs and headphone plug into the jacks in the box, as shown in
Figure 6-19.
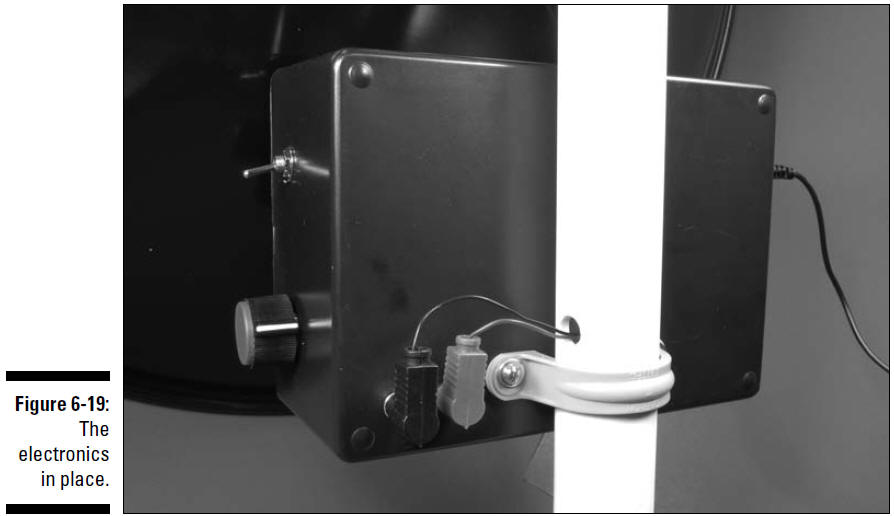
9. Glue the 1" PVC end cap on
the end of the PVC pipe.
You can see the finished product at the beginning of the chapter in
Figure 6-1.