Mounting the microphone
The microphone is what makes this project work. The
first step here is to make the microphone mounting. Follow these steps:
1. Cut four 6" pieces of wooden dowel.
2. Cut a slot about one-third of the way through each
dowel,
1⁄4"
from an end.
The slot has to be wide enough for the washer to
slip into.
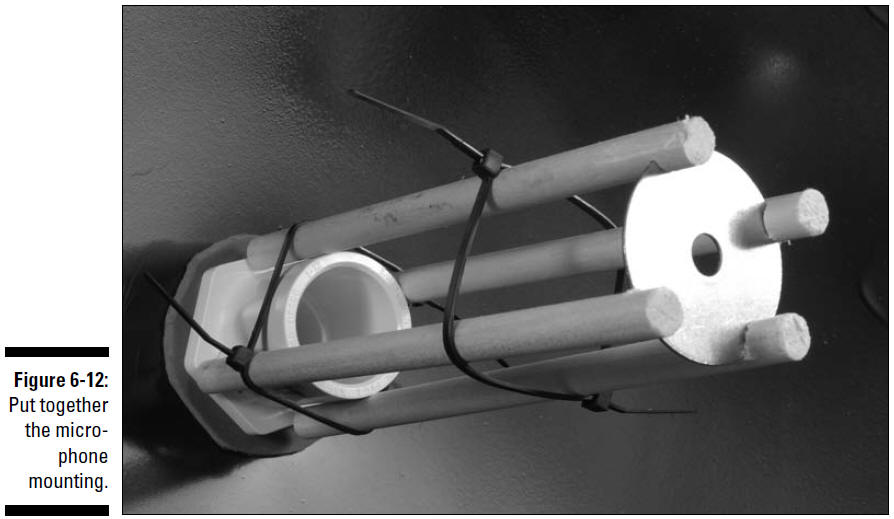
3. Assemble the dowels and
washer in the parabolic dish, as shown in Figure 6-12.
Use cable ties to hold the dowels in place. If you are doing this by
yourself, it can be kind of a struggle, but it is doable. Getting
another person to hold the dowels in place while you put the cable ties
on it will simplify your life.
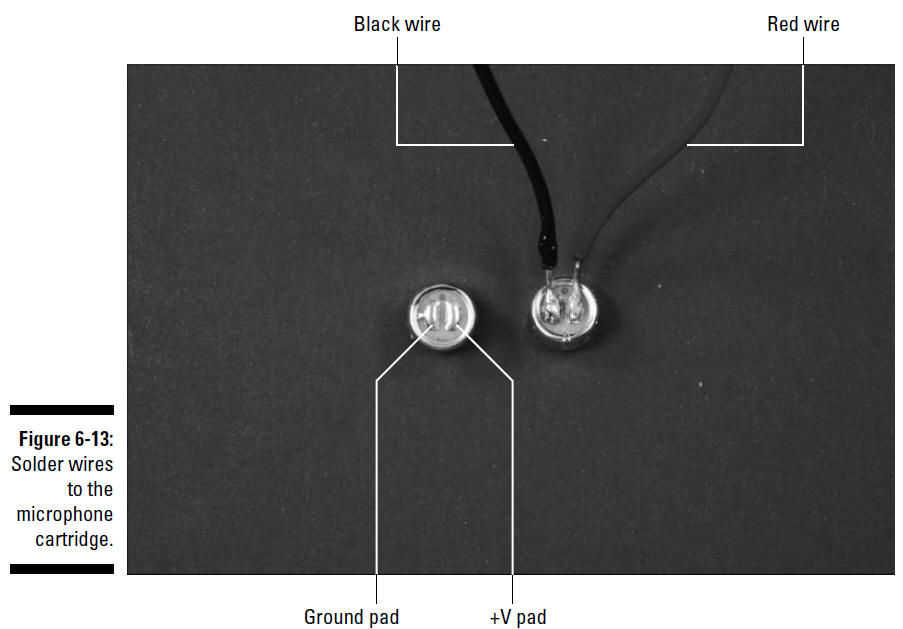
4. Solder an 18" black wire to the ground pad of the
microphone cartridge and an 18" red wire to the +V pad.
Figure 6-13 shows a cartridge before and after
soldering.
5. Twist the free ends of the
wires from the microphone cartridge together and feed the microphone
wires through the PVC fittings from inside the parabolic dish until the
end of the wire reaches the 3⁄8" hole.
If you have trouble
pushing the wires around the 90° turn, take a stiff wire with a hook
shape in the end (we used some 10 gauge wire; many building supply
stores will sell you a few feet of this) and pull the wires through the
PVC fittings and pipe.
6. Use a piece of 20 or 22
gauge wire with a hook shape on the end to pull the wires from the
microphone cartridge through the 3⁄8" hole.
7.
Pull the wires through the 3⁄8" hole, leaving enough wire inside the
parabolic dish for the microphone cartridge to reach the 11⁄2"
washer with about two inches of slack left over.
8. Cut the wires to allow three
inches to extend from the